Anaglyph imagery from video sources
What is an anaglyph?
Source http://www.merriam-webster.com/dictionary/anaglyph
“..a stereoscopic motion or still picture in which the right component of a composite image usually red in color is superposed on the left component in a contrasting color to produce a three-dimensional effect when viewed through correspondingly colored filters in the form of spectacles.”
For our purposes, an anaglyph is the merging of two image files that represent the view point of the left and right eye. Since we’ll view the images with color filtered glasses, each of the images will need to be color tinted before merging.
If you don’t have anaglyph glasses, they can be purchased from Amazon, https://www.amazon.com/s?ie=UTF8&page=1&rh=i%3Aaps%2Ck%3Aanaglyph%20glasses. The glasses I’ll be using have red filter over the left eye and a blue filter over the right eye.
How to create an anaglyph
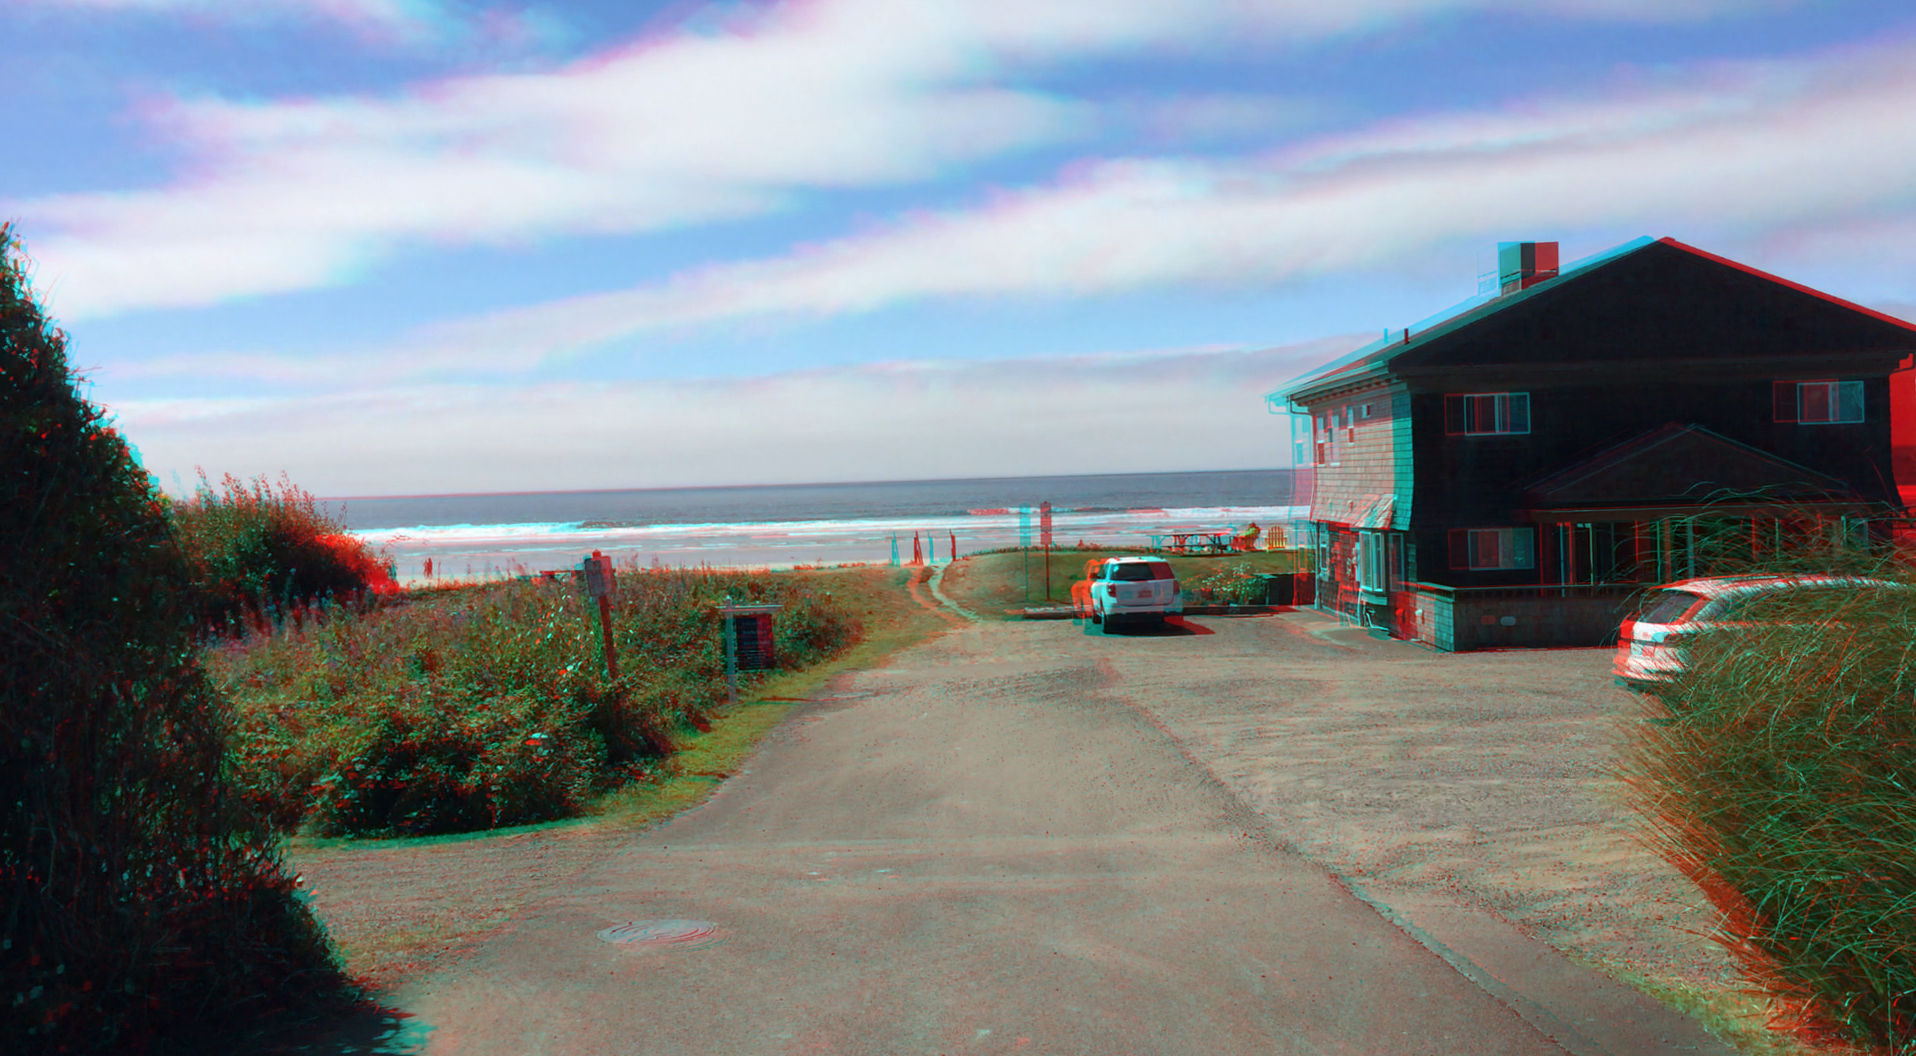
In order to create an anaglyph, we need 2 images of the same subject, taken from 2 angles along the horizon. We want to mimic both our eyes. Think of 2 cameras taking a picure of an item at the same time, one on the left and the other on the right.
Once we have them, we need to apply a color tint to each then merge them into a single image. This can be done with GIMP and a convenient filter called “script-fu-make-anaglyph.scm”. The filter is available on line, http://registry.gimp.org/node/6527
GIMP is an image manipulation program that has open source GNU licensing, hence its name. It supports scripting languages that automate the user interface and perform commands. This is useful for large projects. It saves time and effort by manually operating the program, selecting menu items, and repeating the process over and over again.
The anaglyph filter details are as follows, “This program creates stereoscopic 3D anaglyph photos from a stereo pair. In order to make use of this program you will first need a pair of images from slightly different angles or the same object. You then need to place both images as different layers in the same image window in Gimp with the right image as the Bottom layer and the left image as the next layer above it and no other layers in the image (if you use this script in other circumstances then it probably won’t work properly). The script finishes leaving the two images as separate layers so that final alignment adjustments can be made before merging the layers down and saving the anaglyph.”
Once you download the “script-fu-make-anaglyph.scm” file, place it in the GIMP scripts folder. The path can be found by opening GIMP and selecting Edit > Preferences > Folders > Scripts. You should see the paths in the window. Mine happens to be in /usr/share/gimp/2.0/scripts. After you get it in the folder, restart GIMP and you should now see a Stereo option in you menu bar.
Now to create an anaglyph from images
First, lets source 2 images to work with. In this example, I’ve used 2 pictures I took side by side of the same subject. Open one of the images in GIMP, doesn’t matter which one. Next, open the next image as a layer from the menu File > Open as Layer. Now both images should be listed in the Layers Tab. Rename the layer attributes as Left for the left image and Right for the right image.
Drag the right image to the bottom. Now we are ready to run the menu Stereo > Make Anaglyph script. Click OK and after a few short moments, you should see the anaglyph.
One thing I notice with side by side shots is the alignment is typically off. You’ll need to select one of the layers and drag the image so they align horizontally.
Not too often, but it can happen, one of the image will need to be rotated. You can do this by selecting the image. Choose the Rotate tool. Click on the selection and set the amount of rotation needed.
Creating anaglyphs from a video source
The same process applies as above, but we need to extract the frames from the video and work with the frame images.
In this example I took a video of a subject and walked sideways, There are a couple of ways I extracted the images, first was from the command line using this command.
avconv -i ‘/home/local/Desktop/IMG_2422.MOV’ -r 30 -f image2 ‘/home/local/Desktop/images/%05d.png’
I ended up with an images folder on my desktop with each frame as images. Next, I selected 2 of the images as my left and right source and did the same process of creating anaglyphs.
I also used OpenShot Video Editor to extract frames from lengthy videos. Running the avconv command would result in a vast amount of images to sift through. Using OpenShot lets you cut a potion of the video clip and then extract that to images.
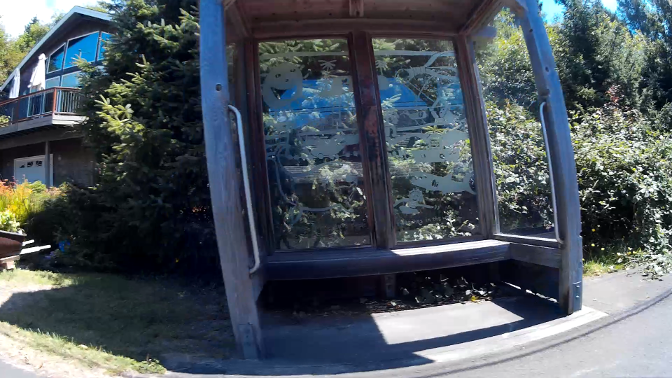
Video sources with wide angle lenses
Wide angle lens video sources present a problem for anaglyphs. The distortion from a wide angle lens warps the subject. Using these images without any changes can result in difficult to view renders. To correct this, we’ll need to make changes to the images in GIMP to correct the distortions. Once they have been corrected, then the anaglyph filter can be applied.
Gimp fish-eye correction info on line,
http://www.texturemate.com/content/how-easily-remove-lens-distortion-photos-using-gimp
Choose the menu Filter > Distorts > Lens Distortion. The Main slider will change lens distortion, adjust as needed. I’ve also found changing the Edge and Zoom levels helps as well.
One other artifact I found from my video source was skewing. I used an action camera mounted on a bike, pointed perpendicular to the direction I was moving. The skewing is a result of the digital process reading values from the image sensor in the camera. It reads the values from the top edge of the sensor to the bottom edge. Since it can’t do this instantaneously, the camera is moving during this sensor read. As a result. The top of the image is bent to the left and the bottom to the right. This also messes up the anaglyph process.
Again, GIMP can correct this. Using the menu Tools > Transform Tools > Shear, adjust the amount of skew to correct. You can see in this example that the amount of distortion from the original and the final image are significant.

Now we apply the same methods for creating our anaglyph.
There are video editing tools that claim to take two dimensional video and convert them to anaglyph video. They do this by applying the anaglyph filter to frames that were taken before and after a set point on the video time line, then combining them over the set time line video frame. These frames are then recompiled into a video.
This process works well if the following conditions are met.
- The camera is viewing perpendicular to the motion of the camera.
- The motion is not too great were blurring or skewing are occurring.
- The lens of the camera is not distorting the subject.
Taking a video source were the camera is stationary or is moving through the subject, the anaglyph will not produce expected results. If you are intent on pursuing more on video anaglyphs take a look at the examples from http://convert-to-3d.com/
Enjoy.