Photo Stitching with Hugin
Taking photos with my iPhone is fool proof, for the most part. The auto balance and focus take most of the effort out taking good shots. There is a lot that goes on behind the scenes that makes this possible. The image sensor data is queued and processed by the phone’s CPU with a bunch of commands in memory. In near realtime, the resulting information is sent to the screen so the operator can do what they need to do.
The built in picture, pano, and video functions work great by and large. However, there are times when conditions exist that reveal the limitations of the iPhone.
During a recent trip, I had a chance to watch a sunset and thought that it would be a great photo. I tried to use the Pano option on the phone, but the exposure was either too high or low. I wasn’t able to work past this limitation on the iPhone. The good thing is that I was able to take a single picture with the correct exposure. However, the intent was to capture both the foreground (family) and background (sunset). I couldn’t do this nor could I step back.
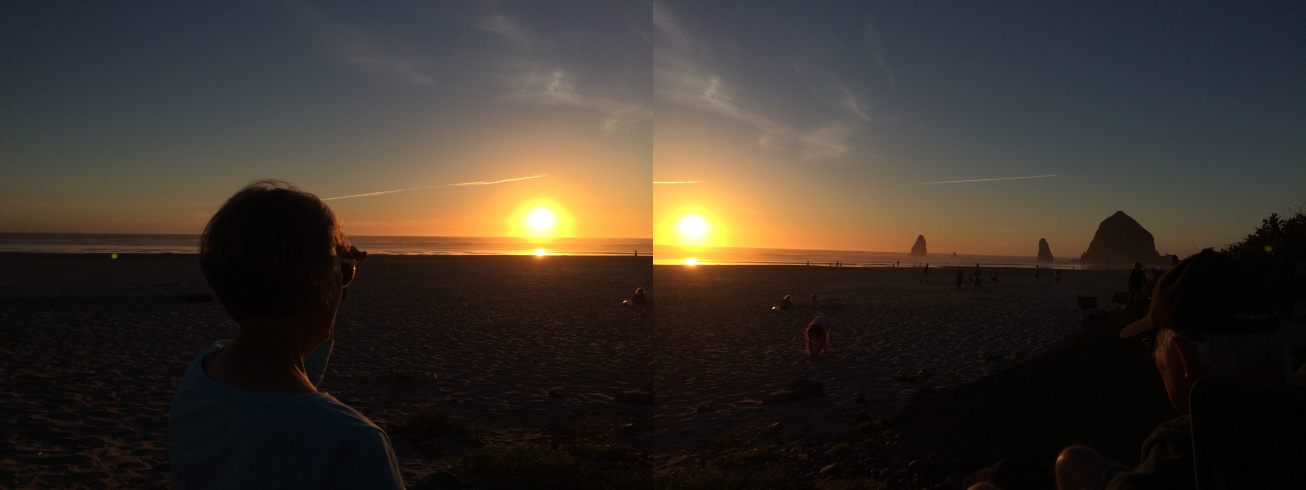
I took 2 pictures, one on the left and right with the exposure set on the background in each. The fix was to stitch the 2 pictures together later on using a software package called Hugin.
Hugin is an open source program that will run on various operating systems, I run mine on Linux. The program will take a series of pictures that share some common features and stitch them together to create larger high resolution images, panoramas, or 360 degree immersions.
For my intial stitching requirements, I only needed the following conditions to be met.
Using 2 or more images to create a single stitched image…
The images are of a subject and each image has overlap aspects of the subject in each….
Here are the steps I took, start to finish.
First install Hugin on Ubuntu
sudo apt-get install hugin
Start by launching Hugin, and using the Photos tab select Add images… button to select the two images you want to stitch.
Select the image # in the list and click on Anchor this image for position and Anchor this image for exposure. You might want to try this tutorial again later selecting image #1 to see what difference these choices make.
If you select or drag in image files which don’t have complete EXIF data, the Camera and Lens data dialog box will open asking for camera and lens data. For a normal pocket camera it is usually safe to enter 50 deg for the HFOV (Horizontal Field of View).
Switch to the Control points tab, this is where you are going to input all the information the software needs to align the two images.
Change the image orientation so that the left image is on the left and the right is on the right. Set Zoom to fit to window, set Auto fine tune, and auto add are checked.
Now you can use the mouse to select control points; pick well defined features that you can see in both the left and right-hand window.
Hugin aligns images using these control points, each is actually a pair of locations, one for each of the two images being connected.
When you first select a point a high magnification window will open to help you with selection. If you hold down your left mouse button you can roam around until you have the cross hairs just where you want them.
For the first control point you will then need to go to the other image and click the corresponding location, Hugin will then automatically fine-tune this position. For subsequent points, when you have finalised your selection on the first image Hugin will automatically find the point in the second image.
Repeat until you have about 5 or 6 pairs of control points.
Choose Optimize from the Edit menu, it runs and does what it does without modification.
Next, select View > Preview Window. Click Auto and adjust the scroll bars on the left and bottom to adjust the preview. Clicking the crosshairs on the image will select it as the center point and adjust the image position that way.
Finally we are going to generate the output image. Select the Stitcher tab. Here you will be prompted to save the project and then to select your output file name and format.
When it completes, you should have a single stitched image that is a merge of both of your original images.
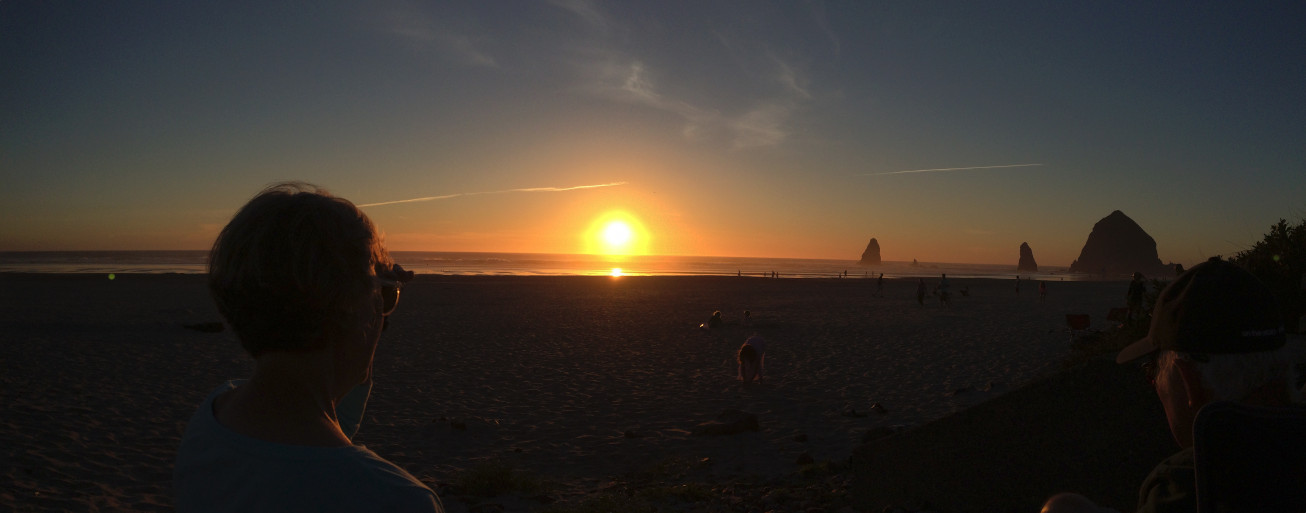
Projection: Cylindrical (1)
FOV: 111 x 50
Ev: 16.09
Thanks goes out to these sources for the above information.
Video – Hugin Part 1 – Overview and Stitching 3 Photos.
Hugin Tutorials – Stitching two photos together
http://hugin.sourceforge.net/tutorials/two-photos/en.shtml