3D Rendering from Facebook Videos
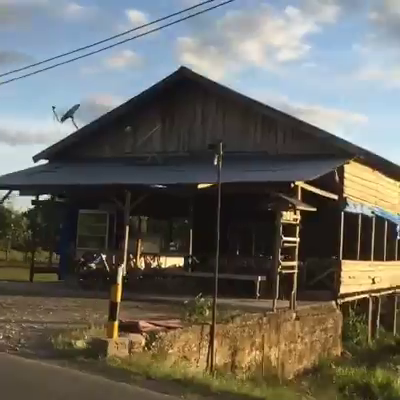
First, source your video from facebook. I used a video shot from a motorbike of a structure on side of the road. It was from a post of a road trip in Indonesia by a fellow with my same name. The scene reminded me of my travels in the Southwest Pacific when I was younger. It looked like good material as a source for model rendering.
For more information on the following steps, see this link for the details. I referenced it when creating capturing the video source. See link – https://www.youtube.com/watch?v=Y1kD8_ZEWRM
Steps to capture video posted on Facebook for processing.
1. First of visit the video page on Facebook and copy the URL of the video.
2. Now what you need to do is change above URL to the mobile version URL. All you need to do is switch “www” with “m”.
3. Open mobile URL on a new page, play video and then pause.
4. Make right click on video and you will get the option “Save video as”.
Now we can extract the frames from the video to create individual images that will be used as our modeling source. To do this I ran the following command after creating a destination folder to contain the extracted frames.
avconv -i facebookvideo.mp4 -r 30 -f image2 ~/Downloads/Video-Images/ImageDump/%04d.png
This saves each of the frames from the video into individual png image files. Now we have images to provide our model rendering program. The program I used is Agisoft Photoscan. I’ve used VisualSFM with a host of other plug-ins in the past, but this method is confined to the Windows platform. With Photoscan, I can run all my processes on a Linux system.
Not every frame of the video contains the object I want to render, I narrow my selection of images to those that have most of the objects features. This also reduces the amount of data that Photoscan will need to crunch through. In all, I selected 15 images that are 400 x 400 pixels in size.
Next, from the Workflow menu, I choose Align Photos. I selected the Highest Accuracy with a Pair preselection of Generic. In the Advanced options, I left them as default. If I had wanted to apply masking of the images, I would have set the option Constrain features by mask. Masking is helpful when the images contain content you do not want included in the render, such as a tree, bush, car, dog, etc. This process ran relatively quick.
Now I ran the Build Dense Cloud from the Workflow menu. I set the quality to Ultra High and accepted the remaining default settings. This took a couple of minutes to grind through the bits.
Then I selected Build Mesh from the Workflow menu. Here I set the Source data from the Dense cloud and changed the Face count to the High value of 180,000. When this completed, my render look more full and it was easier to work with it.
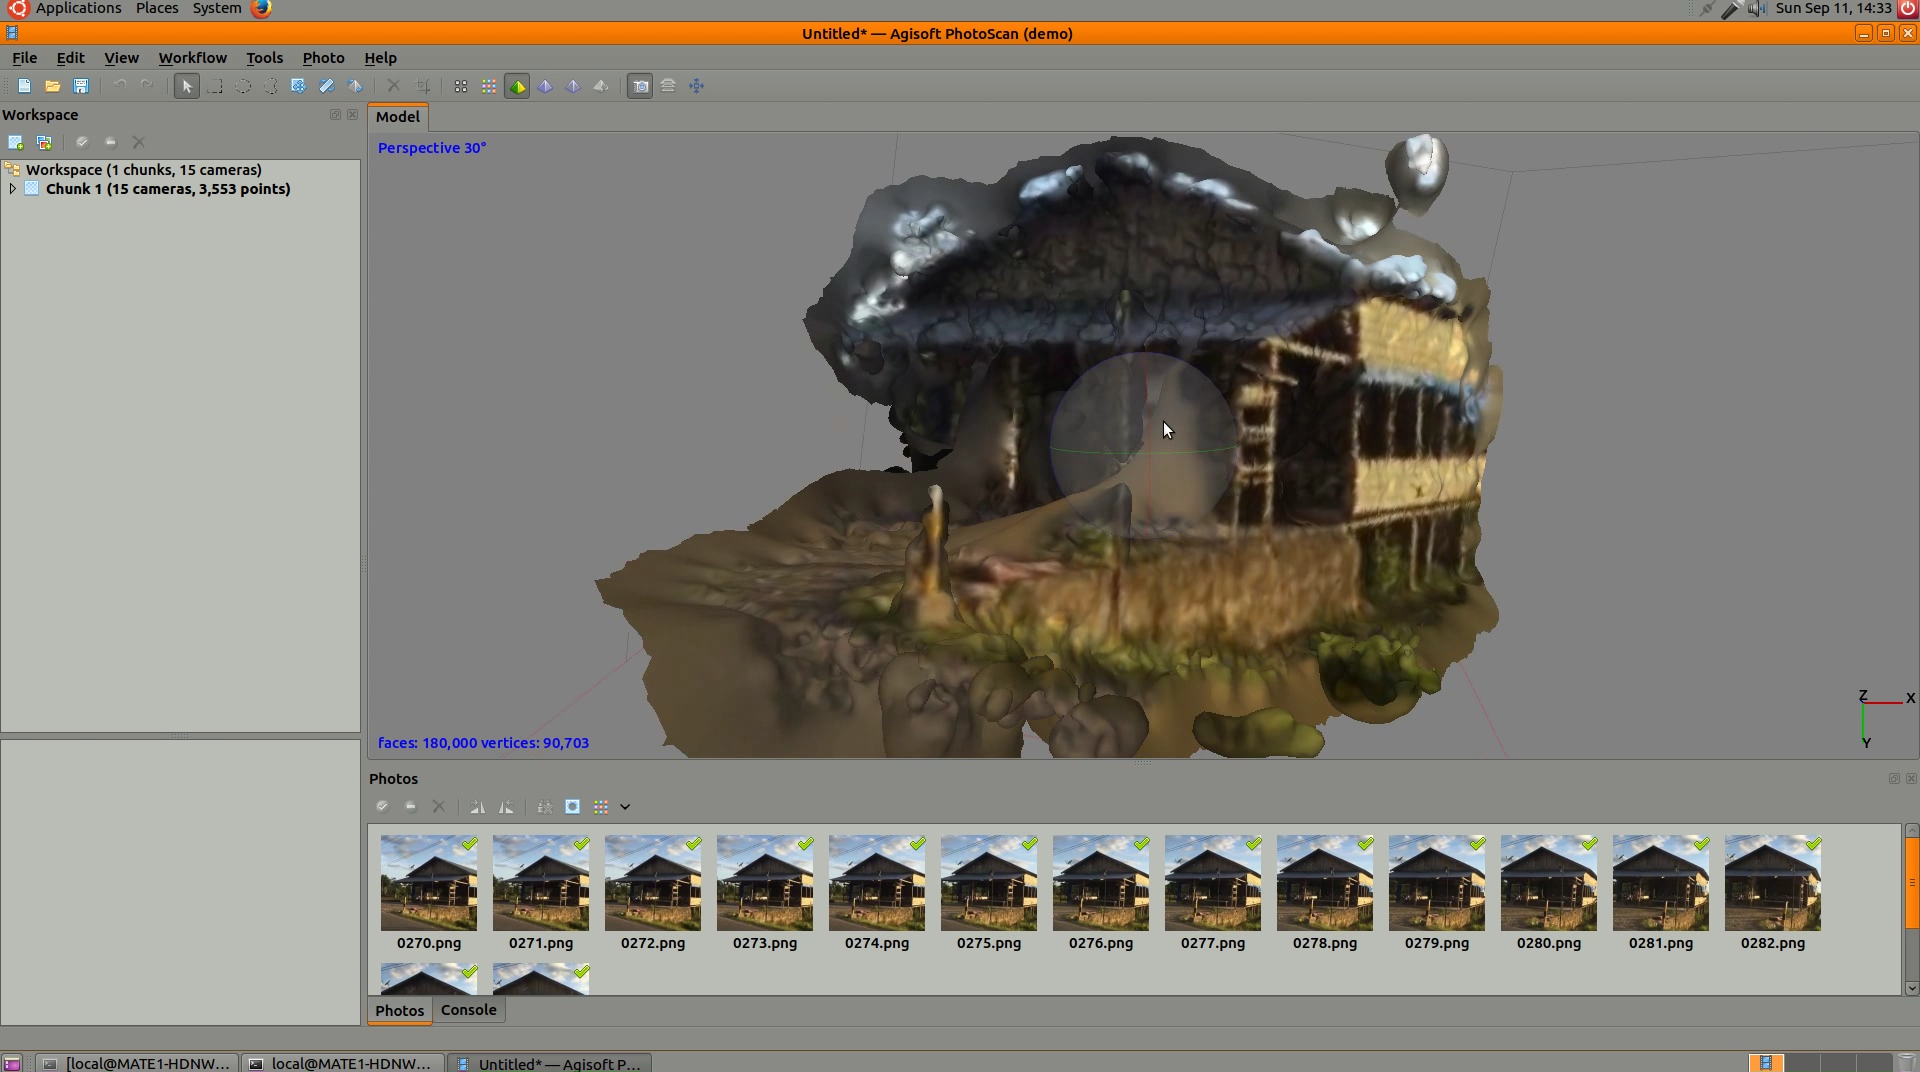
You can see that the render took well from the video source. The key to this success was the video had little lens distortion. I’ve documented in previous posts how difficult it can be when source images are warped. The rendering can become distorted by the lens effects.
I hope you have enjoyed this, happy rendering.