CO Detector Hack – Part 1
I’ll be covering a tear down of an off the shelf CO detector in this post. Next I’ll cover some advanced features that I discovered while testing the CO detector. This unexpected discovery is the reasoning behind a slight delay in the publishing of this post.
The CO detector I’ll be using in this example will be a First Alert Carbon Monoxide Alarm, model number CO400. It should be noted that tampering with the alarm can result in the unit failing. You assume all risks if you decide to open a detector like this and then proceed to use it to ensure safety. The purpose of this post is to provide information on how test equipment can be used to find features of everyday devices. I will not be held accountable for your actions, you assume all liability if you choose to rely on a tampered device. It’s my hope you do not ignore this warning.
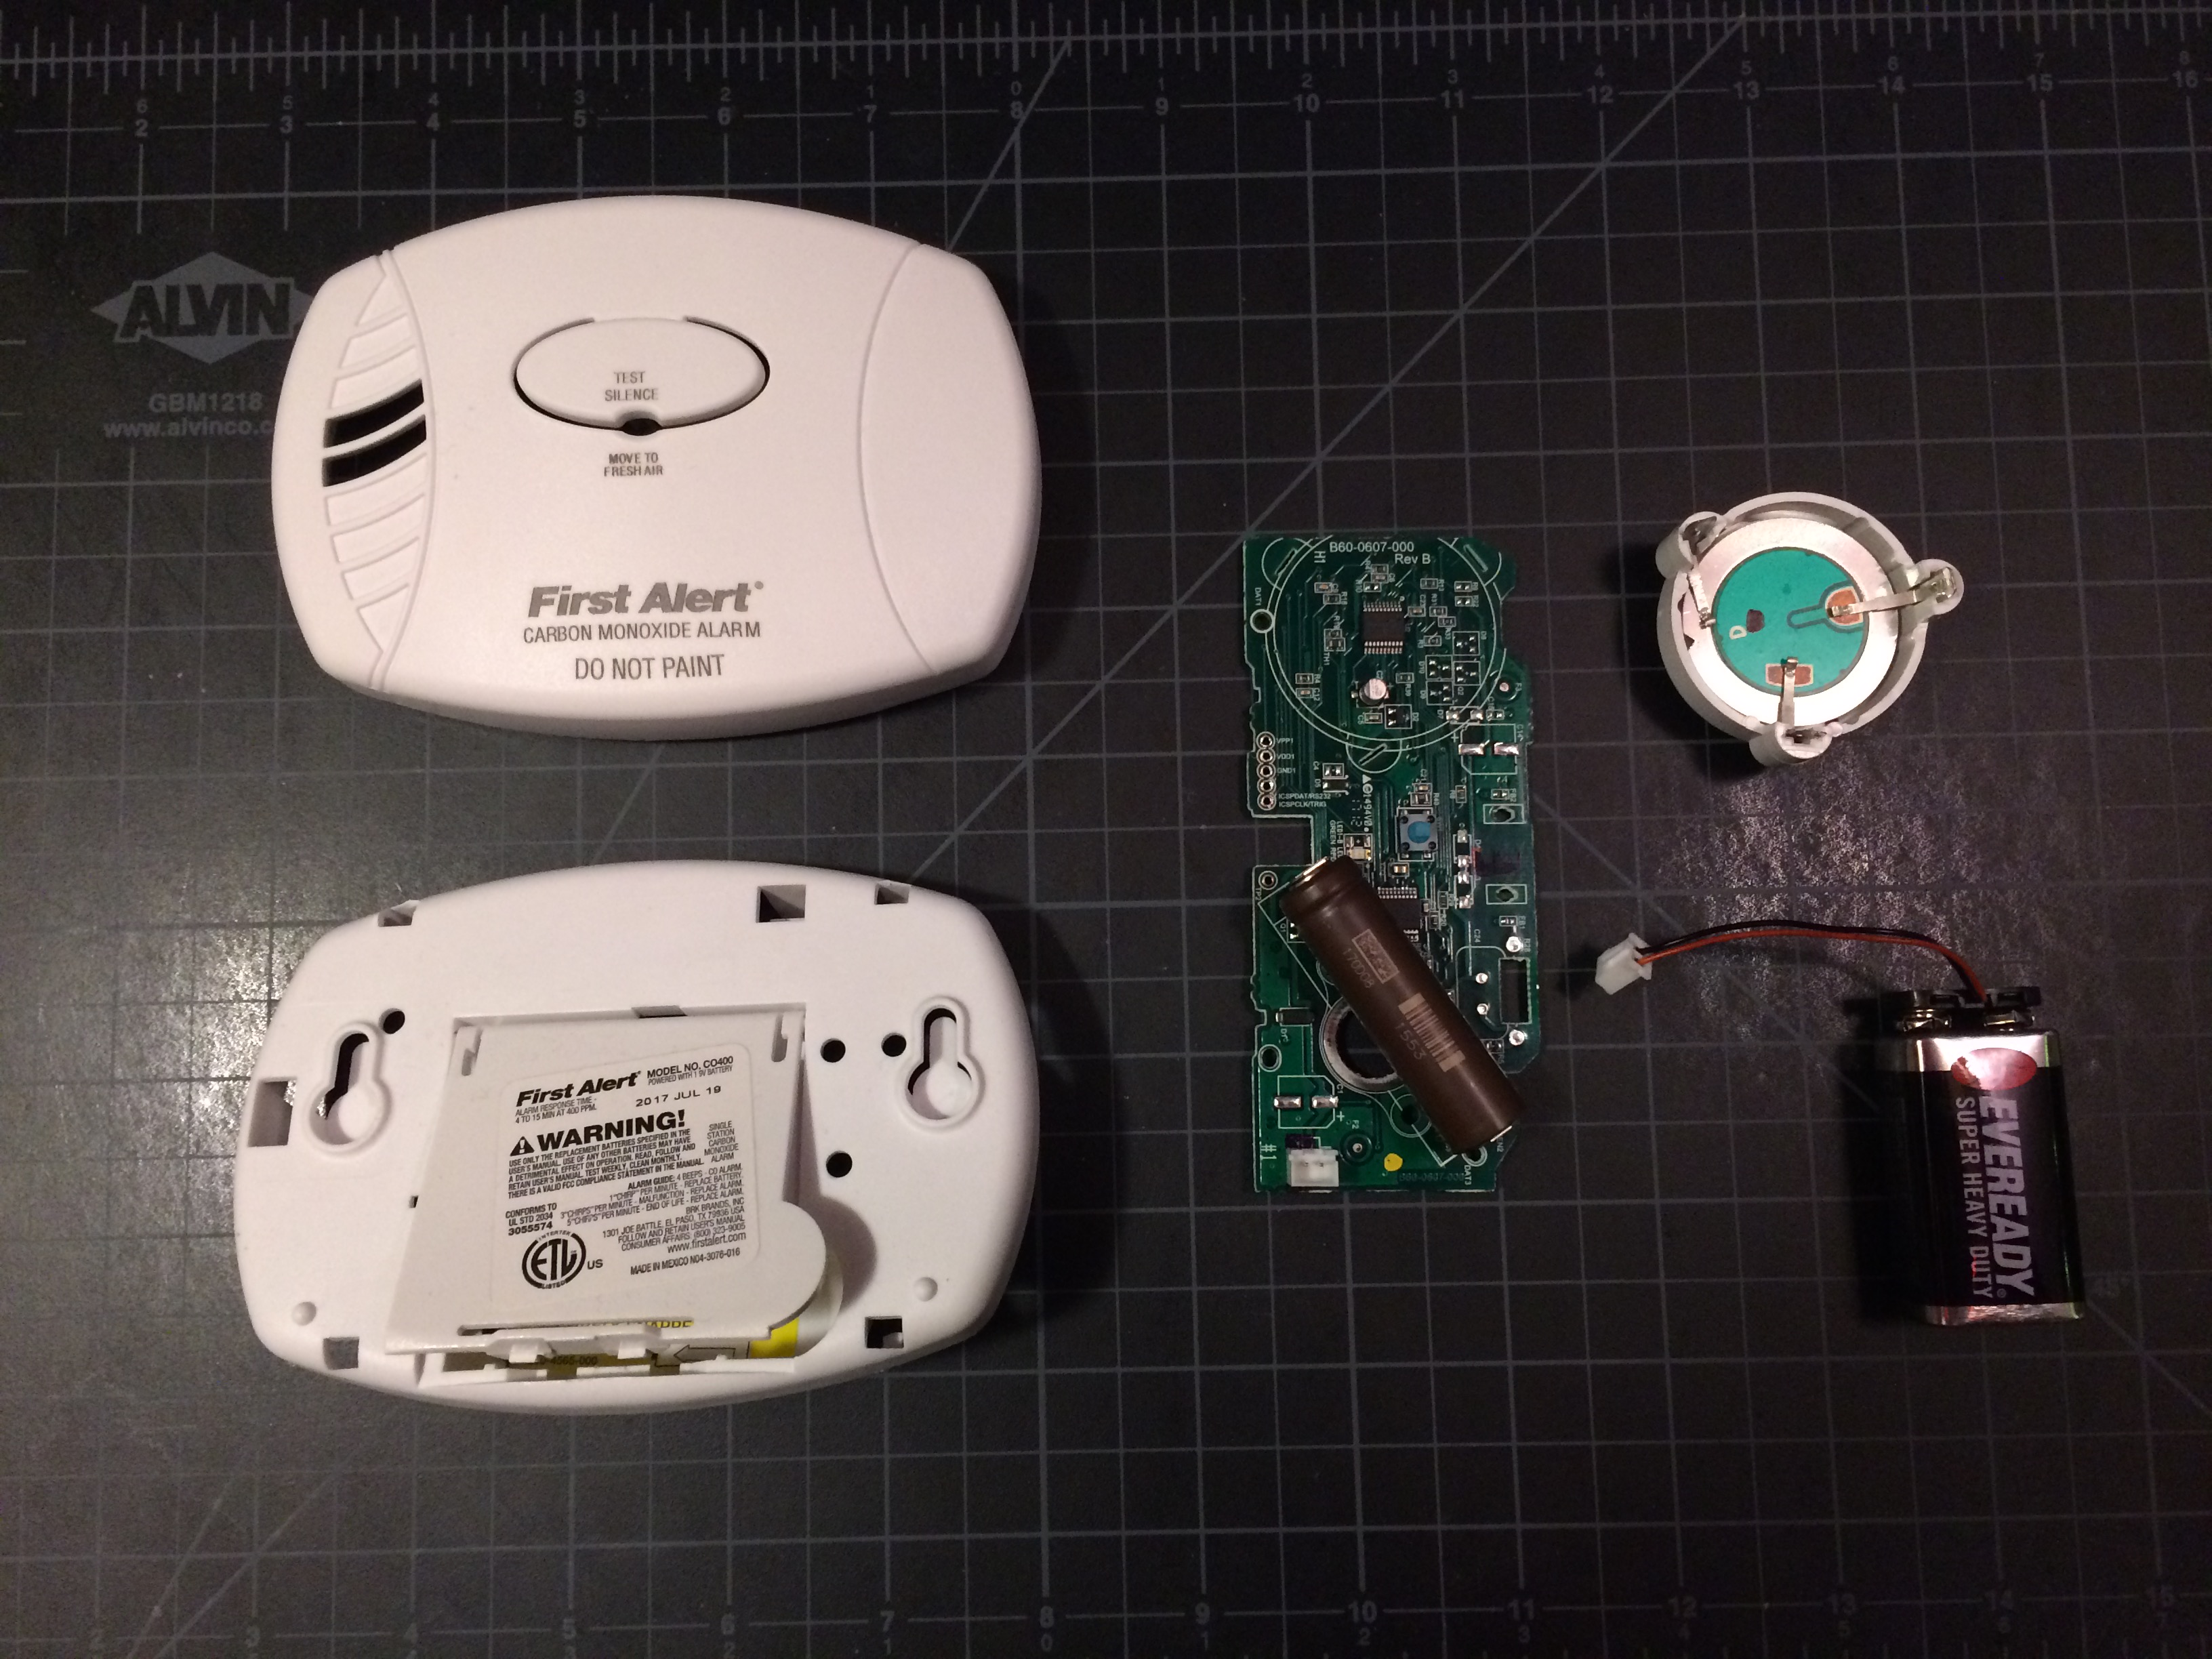
The case for the CO detector I’m using was simple to open, there were a few latch tabs that easily released. With the lid off, the internal circuit board contained all the working components. Leading from the circuit board was a 9 volt battery terminal that attached with a JST connector. I like that they selected this versus a typical soldered connection.
The alarm buzzer was held to the circuit board with three stems. Desoldering these allowed me to remove the alarm buzzer from the board. This makes it easier to identify items with the board removed and all the peripherals out of the way. I like to itemize based on function starting with power. The board doesn’t have an on off switch, so power is on as soon as the battery is connected. When power does get applied, there is a red led that flashes. The red led is located close to the center of the board, near the test switch. The litho identifier for the led is “LED1-A RED” The red led continues to flash every 20 seconds. After a few minutes it no longer flashes. Next to the red led is an open socket labeled “LED1-B GREEN”
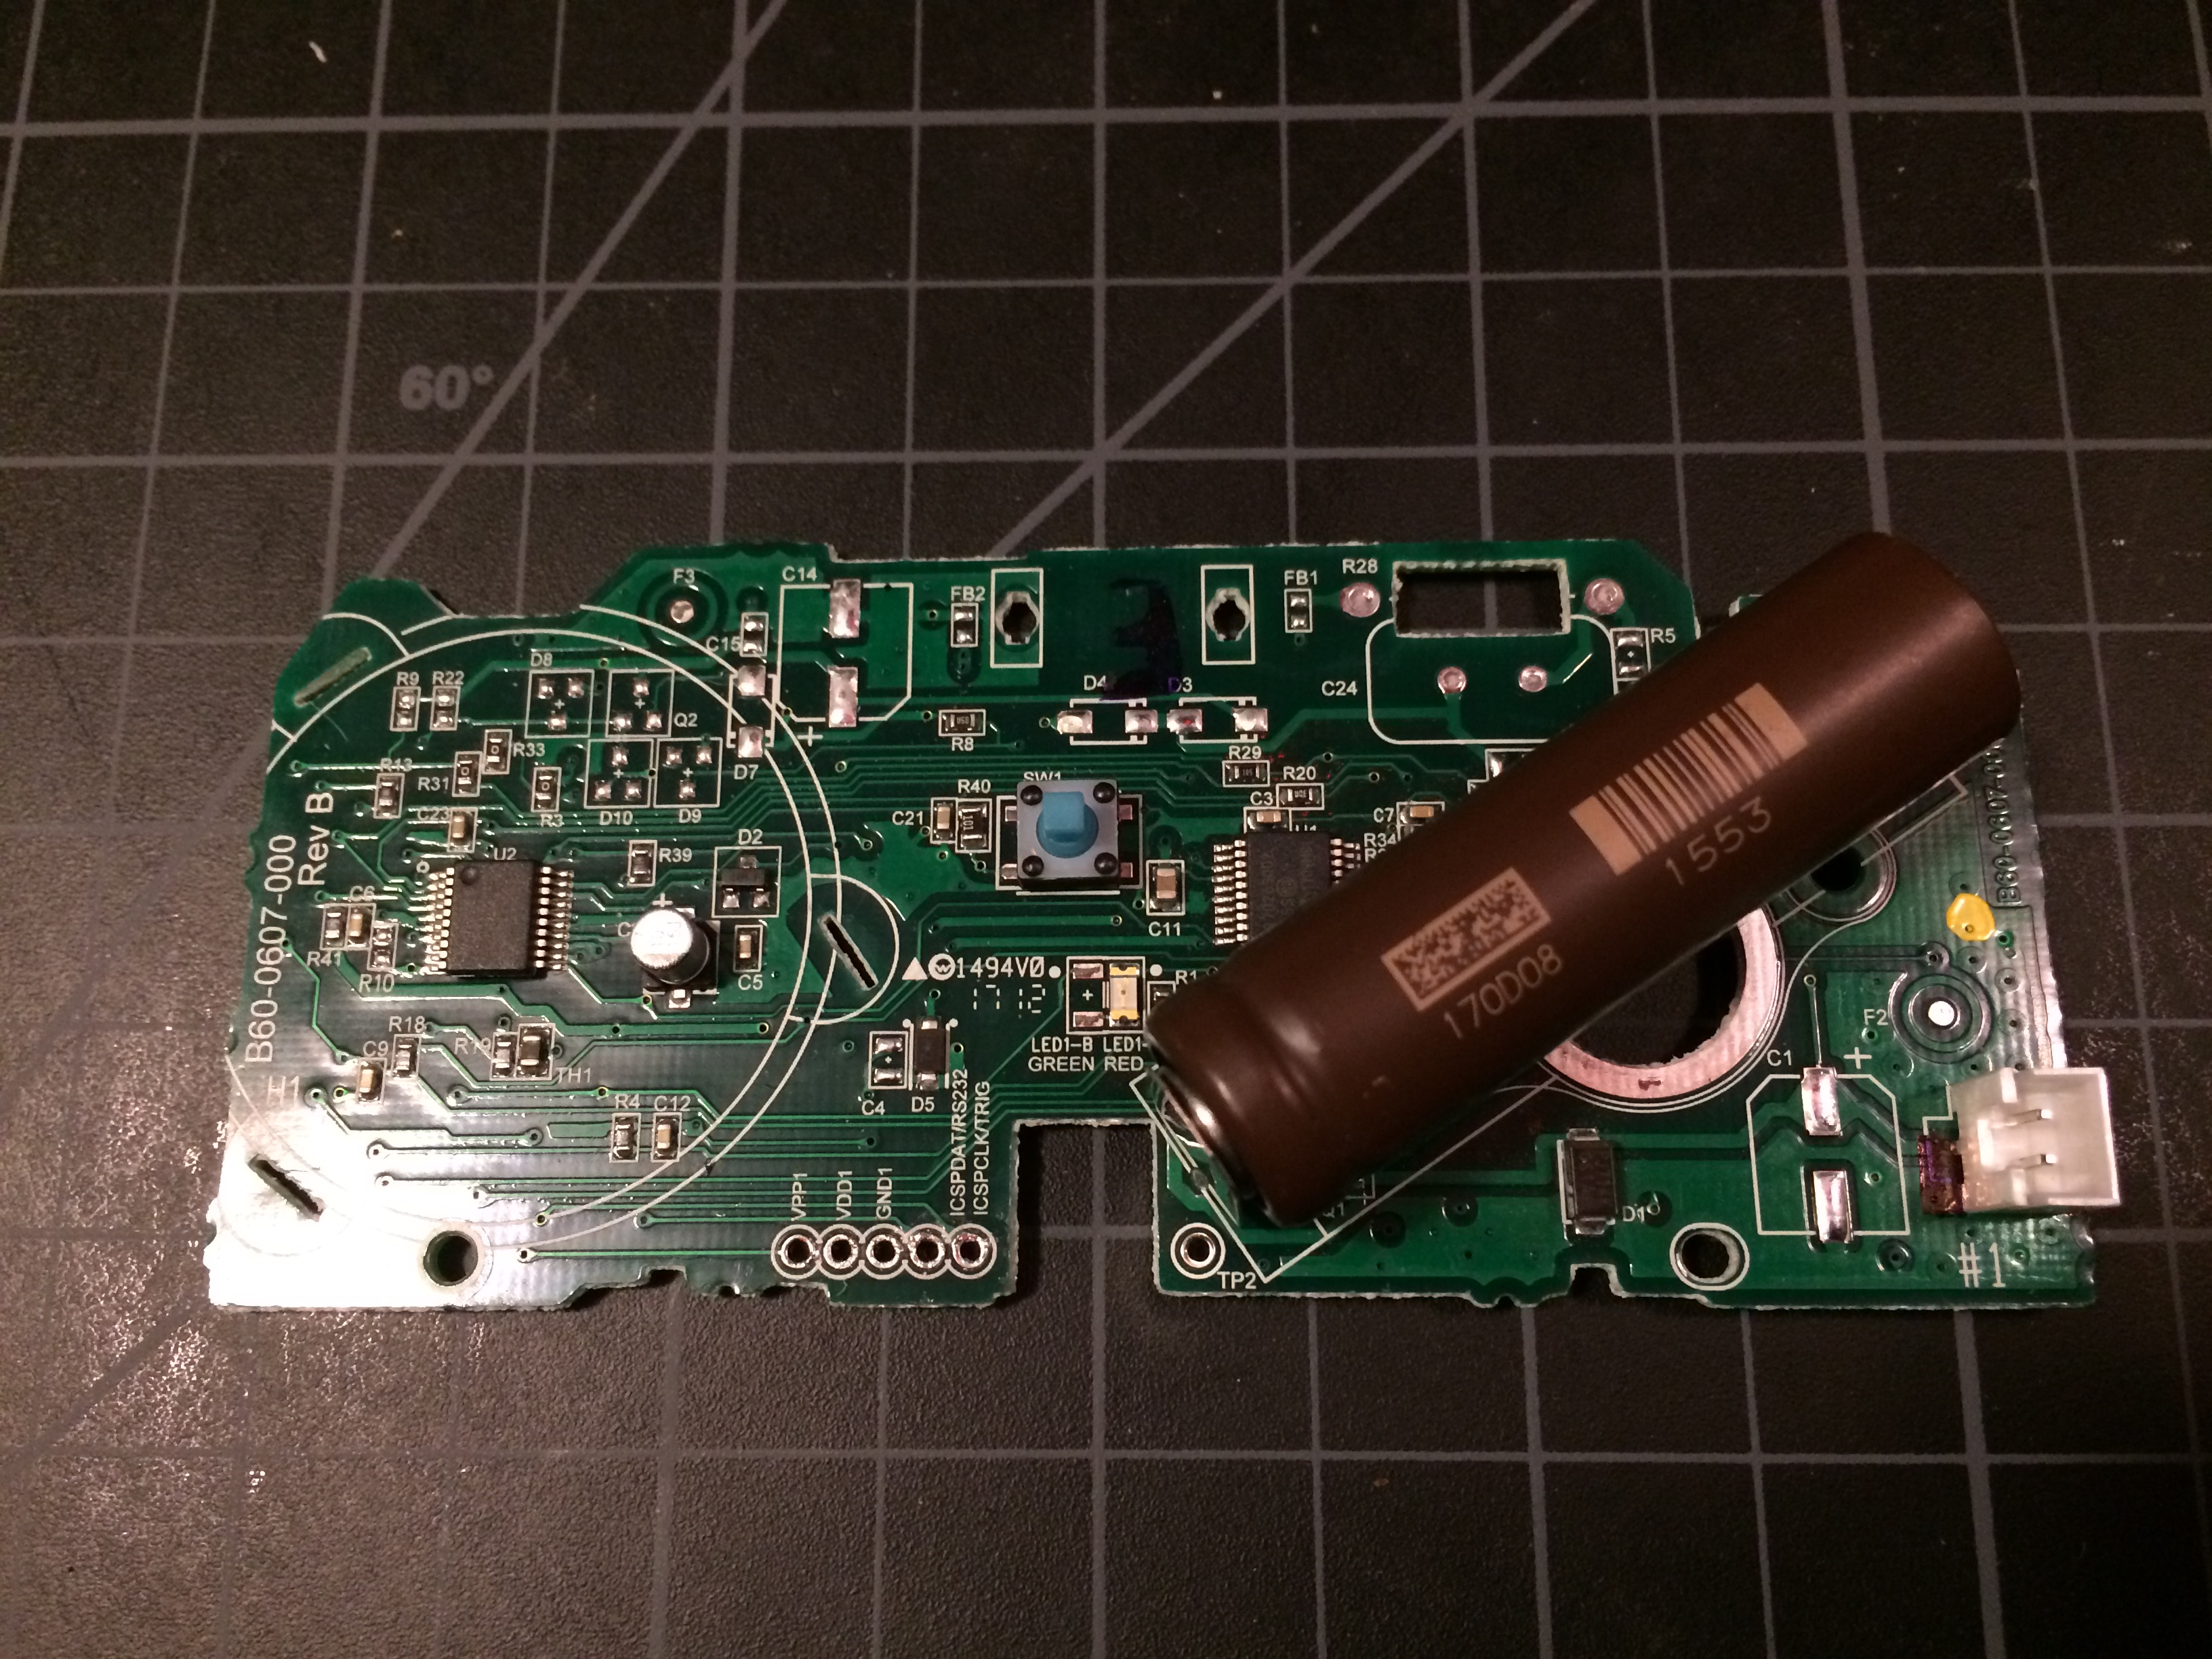
Located in the center of the board is a momentary push button switch. The litho ID for it is simply “SW1”. Pressing and holding the button will initiate a test of the alarm. Since I removed the alarm buzzer, no sound is generated. However, the red led blinks with 2 groups of 4 blinks.
Along the lower edge of the board are 5 sockets that are spaced 1/10th of an inch apart. The are labeled, VPP1, VDD1, GND1, ICSPDAT/RS232, and ICSPCLK/TRIG. The sockets had solder filled in each, but I cleared the sockets and placed a header so I could tap these connections.
The one other item that I was going to do was solder header pins where the alarm buzzer had been. This would let me tap these locations as well. The board has numerous test pads, most were covered with laminate.
The board had this identifier on it, B60-0607-000 Rev B, which didn’t produce any specific search results.
With the header and pins soldered on the board, I’m ready to start taking measurements from the board. I have 3 pieces of test equipment that I prefer to use in this order, a multimeter, a oscilloscope, and a logic analyzer.
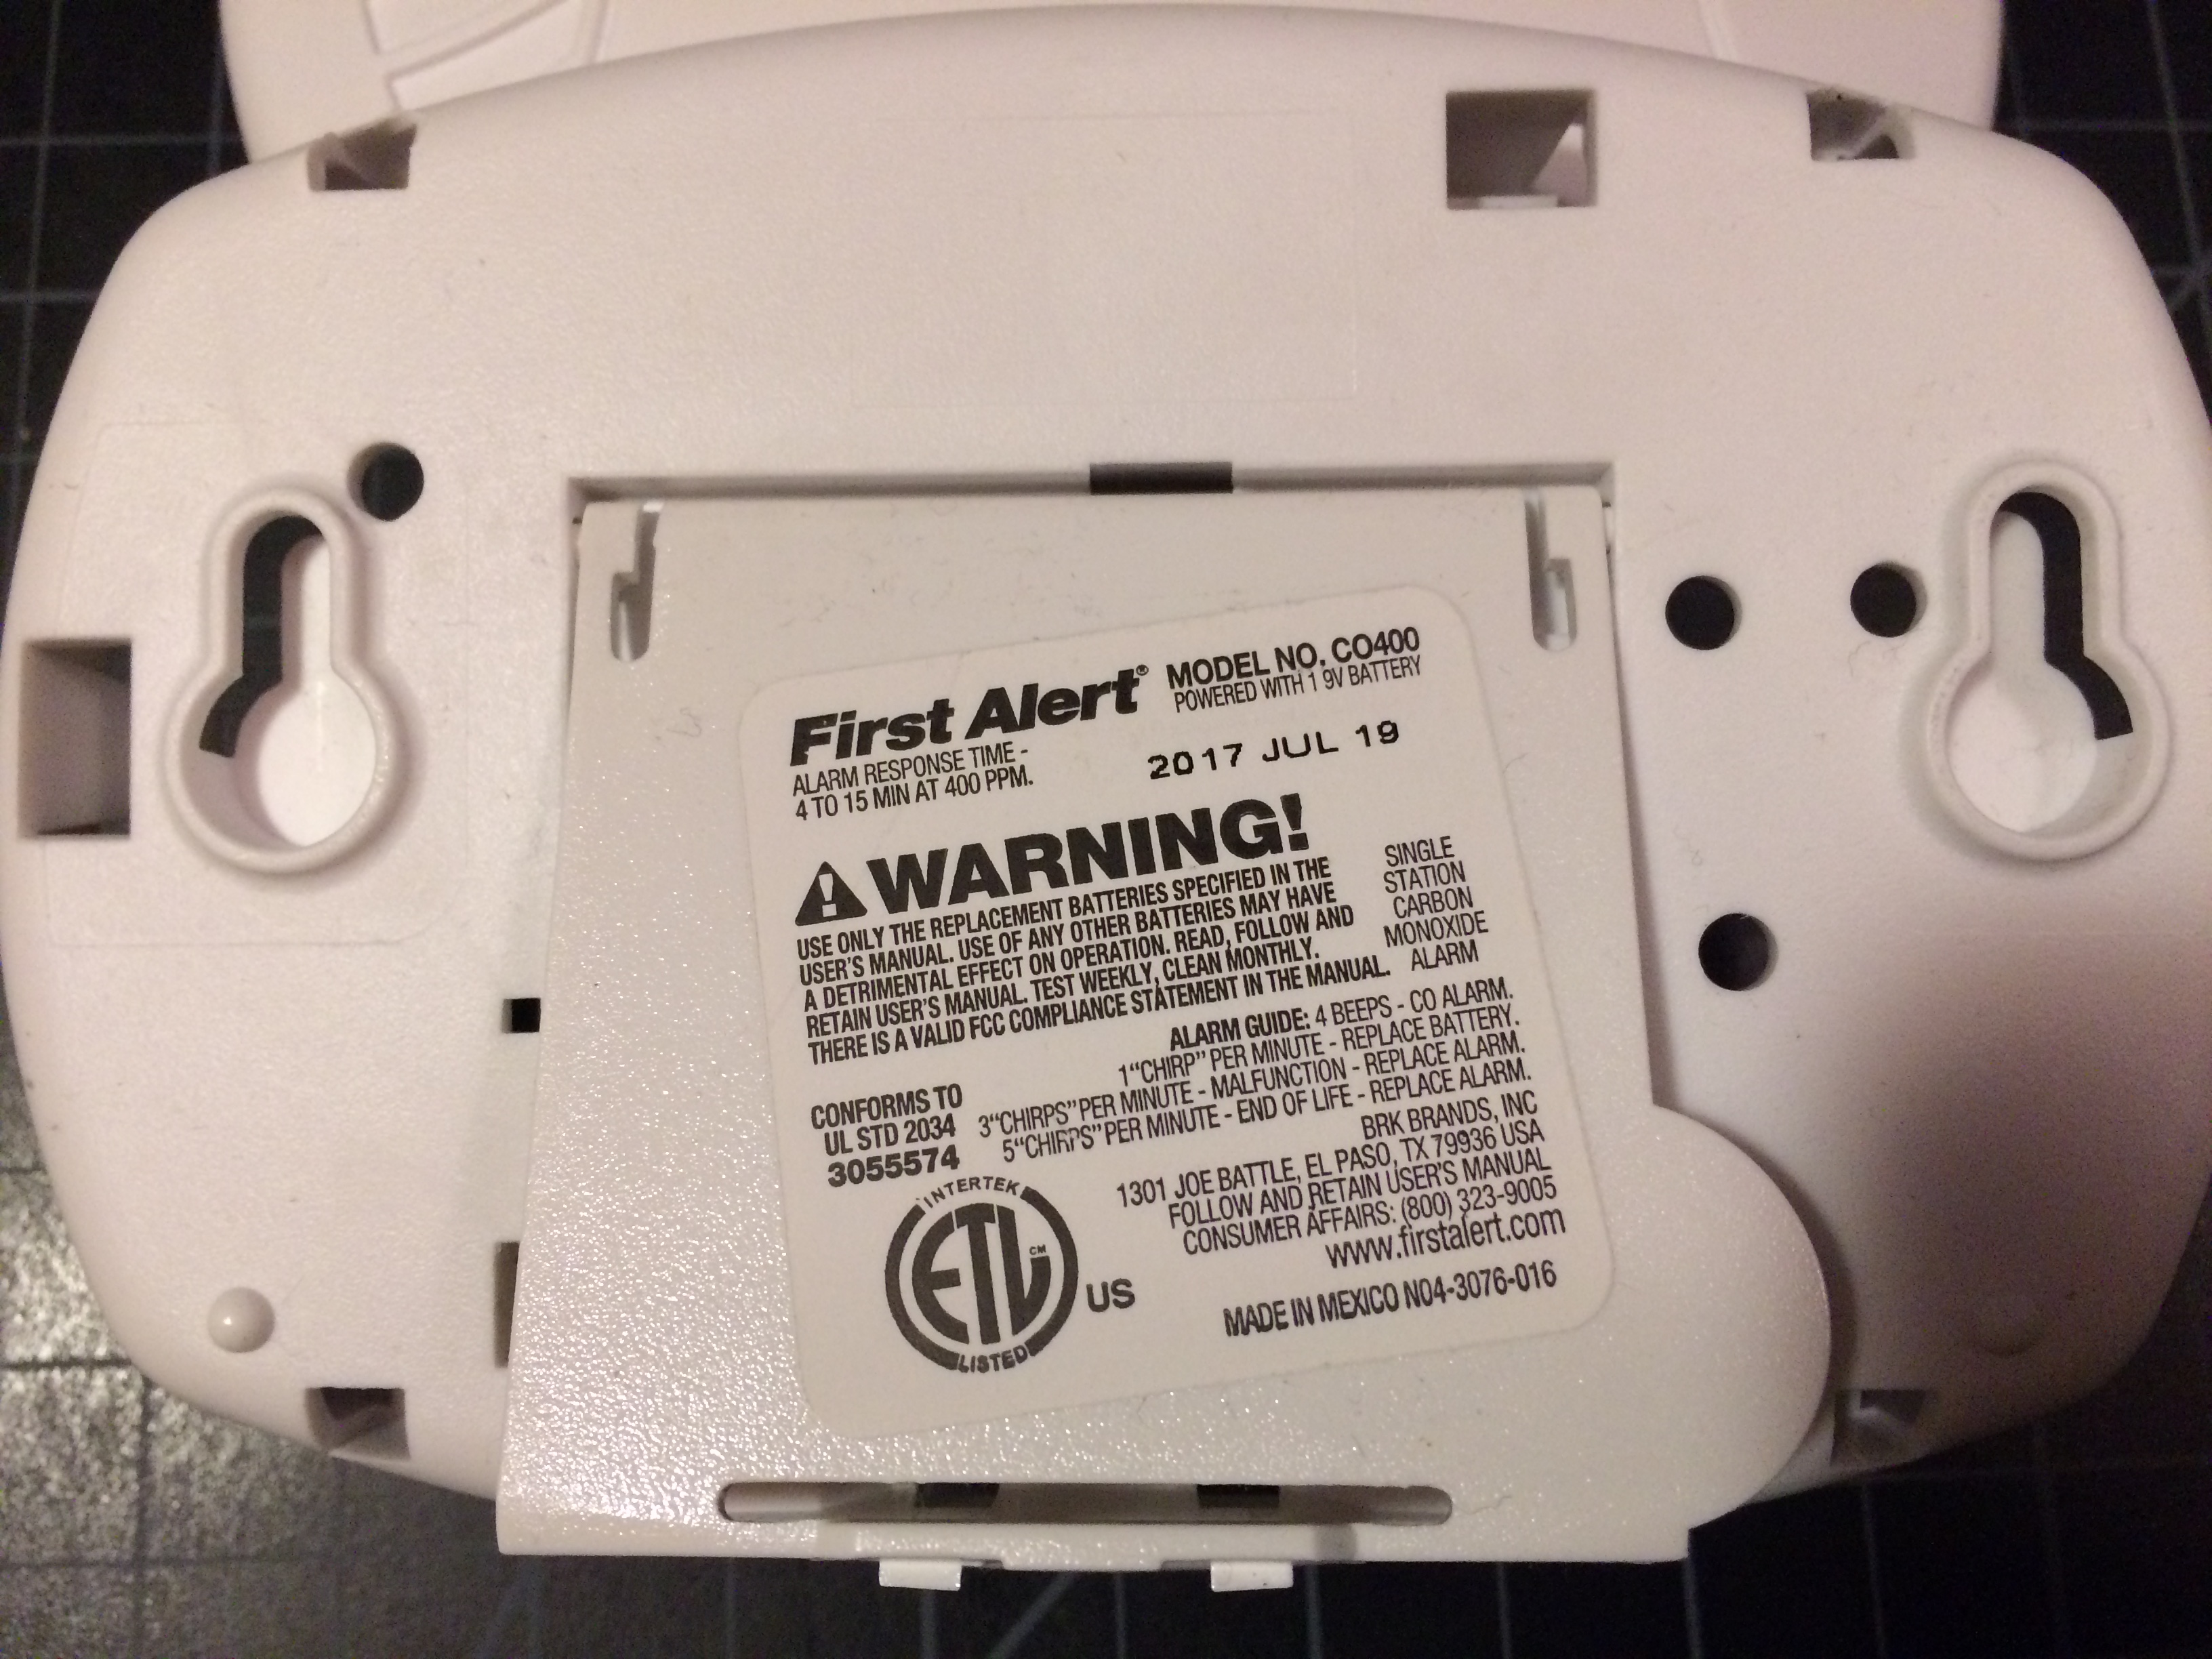
Now for some useful information about CO detectors that some might not know. This CO detector has an operational limit. This means that after so many hours of use, the detector will fail. On the back of my detector there is a stamped date, “2017 JUL 19”. I’m not sure if this is the manufacturing date or if it is when the detector should be replaced. Along with the date stamp is an alarm guide. If the alarm beeps 4 times, this indicates CO levels at or above 400 PPM (parts per million) which is a standard recognized unsafe limit. Interestingly it also says that the detector can take 4 to 15 minutes of exposure to CO levels at or higher than 400 PPM to respond. If the alarm beeps 1 time every minute, this indicates low battery voltage and the 9 volt battery should be replaced. 3 beeps per minute indicates a fault with the detector and the action suggested is to replace the detector. 5 beeps per minute indicates an end of life condition of the detector, again it suggests replacing the detector.
CO detectors are recommended for homes that have any type of fired appliance. These can be hot water heaters, driers, fireplaces, or furnaces. There are other instances were CO detectors should be considered. Kerosene heaters are notorious for creating high levels of CO gas. Care should be taken when operating these appliances. Electronic CO detection often times is the only way to safely measure levels. Having a faulty appliance in the absence of a working detector can create a dangerous environment. Exposure to CO can cause illness or death. It’s not worth the risk to blindly operating these appliances, don’t be a mineshaft canary.